Blog / Feature Tips / Genius Hack: Create a Recurring Event Sign Up
Genius Hack: Create a Recurring Event Sign Up
.jpg)
Are you a super planner? We get it — we’ve been known to organize our closet by color, season and occasion as well. Those same organizational skills can be put to use with your sign ups as you plan for recurring events that will happen throughout an entire school or calendar year. That’s more organization and less stress!
Use Recurring Sign Ups to:
Get Started with Recurring Sign Ups
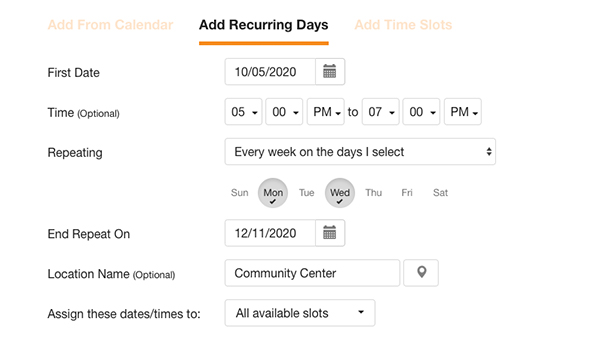
Start by logging in and creating a sign up in your account. When you get to the Slots tab, select the option to Add Dates. In the box that pops up, select Add Recurring Days.
Make your selections and click Add Dates to automatically generate the dates and times you need for the year. If you have multiple recurring times, you can use the recurring dates tool multiple times.
If your sign up spans a timeframe over one month or if you have a large number of time slots, your sign up could end up being too large. If that’s the case, we have a few advanced features that can help simplify things for your participants.
Hide Past or Future Dates
With our hide past or future dates tool, you can make it easier for group members to find the current options on your sign up. Simply select how far in the past or future that you would like to hide dates.
As time progresses, dates in the past will automatically be hidden and future dates will appear based upon the parameters that you enter.
.jpg)
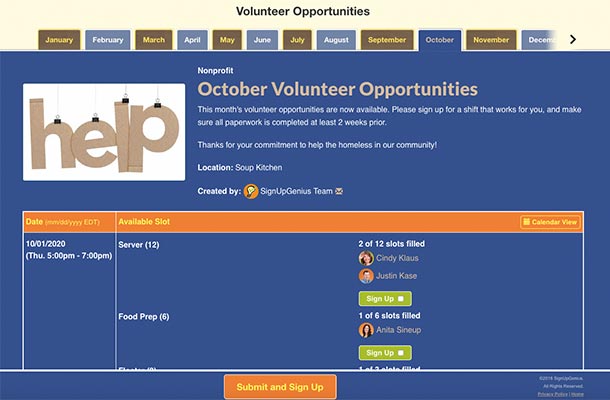
Link with Sign Up Tabbing
With our tabbing feature, you can link multiple sign ups in one spot. For instance, you could create a sign up with volunteer opportunities for each month and then link them together with tabbing.
Genius Tip: If your sign ups use recurring dates for each month, here is a hack that may help:
- Step 1: Create the first sign up — listing all dates and times for the month.
- Step 2: Use our duplication feature to duplicate the sign up for the next month.
- Step 3: On the duplicate sign up, delete all but one of your dates. (At least one date has to remain on your sign up, until you add the new dates.)
- Step 4: Once you have deleted all but one of the dates, select Add Dates to select additional dates. After you have added the additional dates and times, you can then delete that one date that served as a placeholder.
- Step 5: Click the pencil icon next to any slots and check that your slot(s) are assigned to the correct dates/times.
- Step 6: Publish the sign up. Once you have combined all your sign ups into a tab group, you can send a single invite to all the sign ups from the Messages tab.
- Step 7: Repeat step 1-6 for any additional months that you need.
- Step 8: From your main account page, go to the Tools icon and create a new tabbing group with your sign ups.
With these tools and tips, you can create a sign up for the entire year — giving you more time to organize the next thing. Maybe even that sock drawer.
View Features
Posted by Steven Borders
There are currently no comments for this page.
Post Your Comment
NOTE: You do not need an account to post. For the ability to delete, create an account.
|